In this tutorial, we'll walk through the steps to create a simple blog in Next.js with syntax highlighting. We'll cover everything from initializing the Next.js app to installing necessary packages for Markdown parsing, and finally, adding syntax highlighting with Shiki. Let's get started!
#Setting Up a Next.js Project
To begin, create a new Next.js project with Tailwind CSS for styling. Run the following commands in your terminal:
npx create-next-app --tailwind syntax-highlight-nextjs
cd syntax-highlight-nextjs
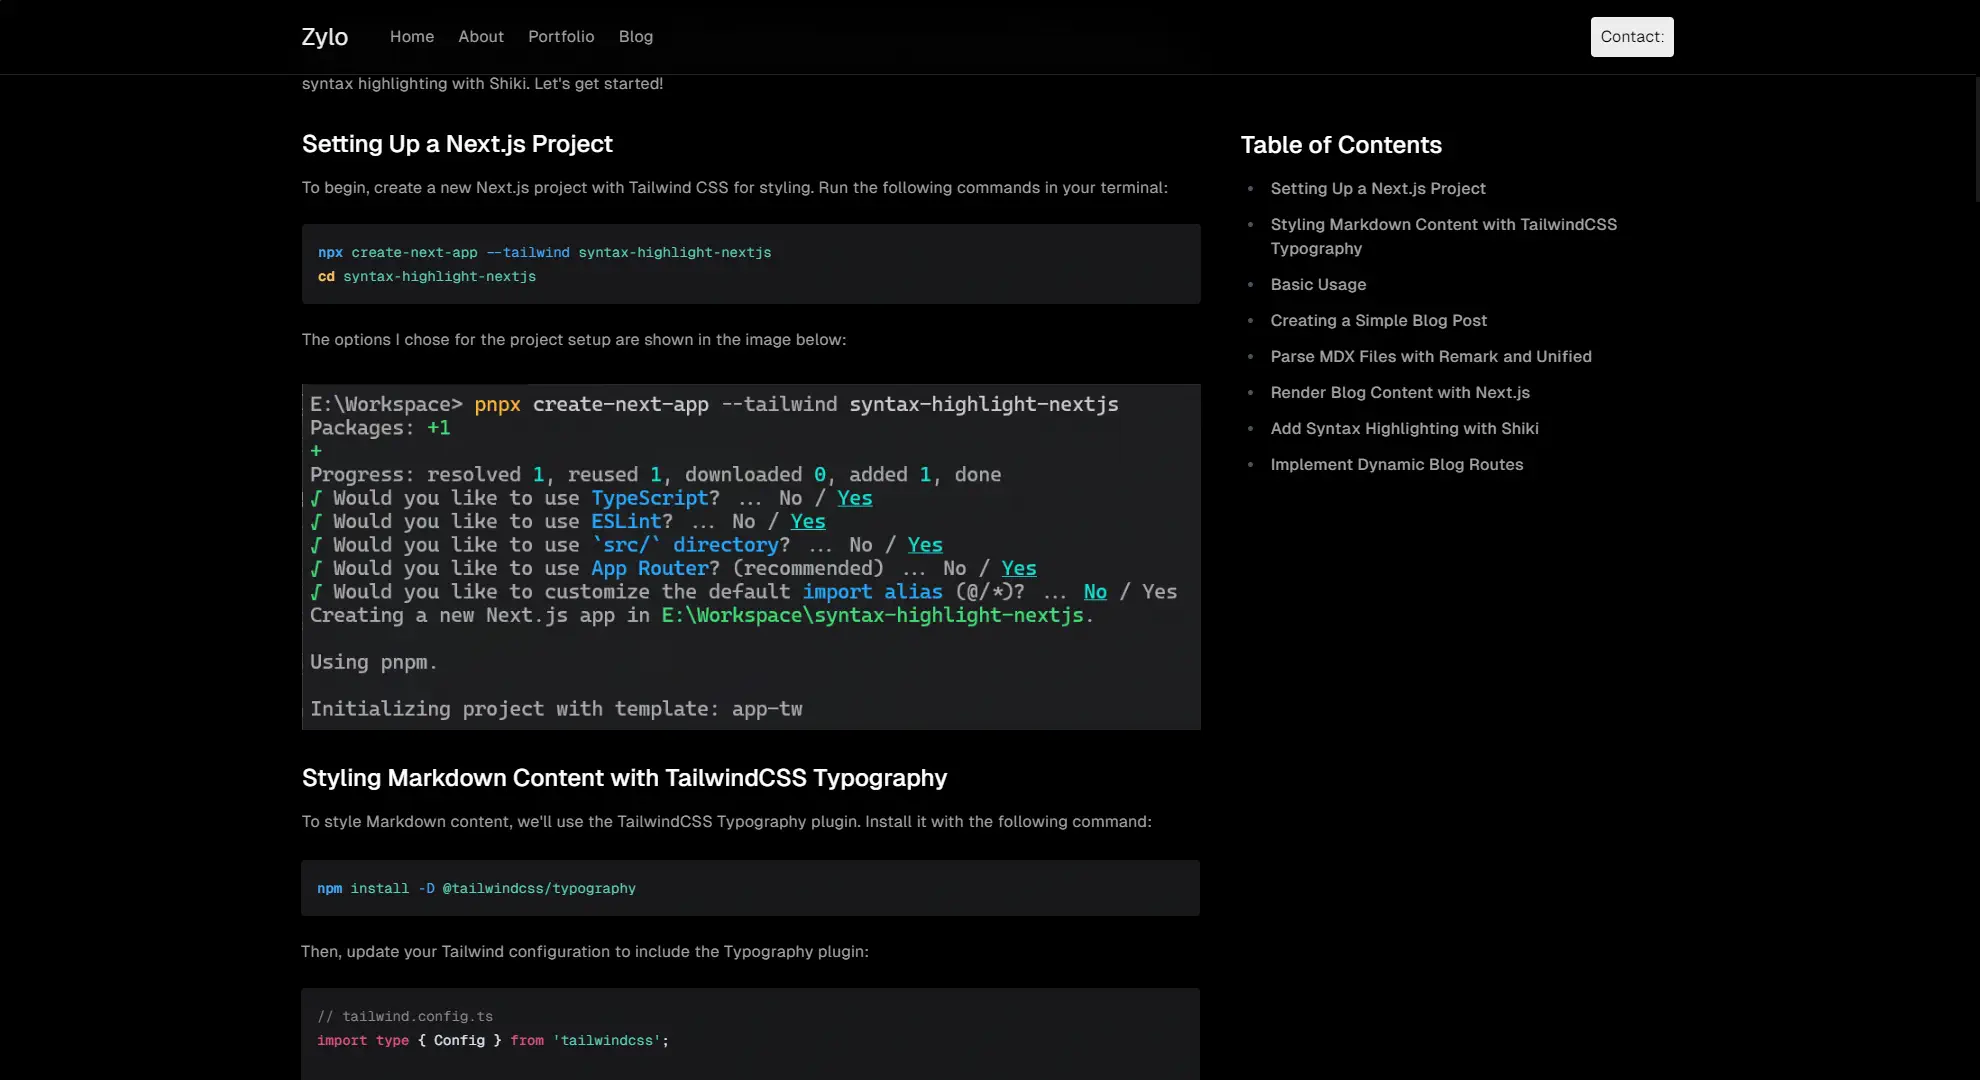
The options I chose for the project setup are shown in the image below:

#Styling Markdown Content with TailwindCSS Typography
To style Markdown content, we'll use the TailwindCSS Typography plugin. Install it with the following command:
npm install -D @tailwindcss/typography
Then, update your Tailwind configuration to include the Typography plugin:
import type { Config } from 'tailwindcss';

const config: Config = {
    plugins: [
        // Other plugins...
        require('@tailwindcss/typography'),
    ],
};

export default config;
#Basic Usage
After setting up TailwindCSS Typography, you can start using it in your Next.js project. Replace the default content in
src/app/page.tsx with the following code:
export default function Home() {
    return (
        <main className="flex min-h-screen flex-col items-center justify-between p-24">
            <article className="prose dark:prose-invert lg:prose-xl">
                <h1>Garlic bread with cheese: What the science tells us</h1>
                <p>
                    For years parents have espoused the health benefits of eating garlic bread with cheese to their
                    children, with the food earning such an iconic status in our culture that kids will often dress up
                    as warm, cheesy loaf for Halloween.
                </p>
                <p>
                    But a recent study shows that the celebrated appetizer may be linked to a series of rabies cases
                    springing up around the country.
                </p>
            </article>
        </main>
    );
}
Your page should now look like this:

#Creating a Simple Blog Post
Next, let's create a basic Markdown (MDX) blog post. Create a new file at src/posts/test.mdx with the following
content:
---
title: 'My First Blog Post'
description: 'This is my first blog post.'
---

# Heading 1

## Heading 2

### Heading 3

This is a simple paragraph with **bold** text, _italic_ text, and `inline code`.

```lua
local function hello()
    print('Hello, World!')
end
```
Now, we'll set up a helper function to read MDX files, parse them, and extract metadata.
#Parse MDX Files with Remark and Unified
Install the following packages to help parse MDX files:
npm install gray-matter remark-parse remark-rehype rehype-stringify unified
Create a new helper function src/lib/blog.ts to read and parse the MDX files:
import { access, readFile, readdir } from 'fs/promises';
import matter from 'gray-matter';
import path from 'path';
import rehypeStringify from 'rehype-stringify';
import remarkParse from 'remark-parse';
import remarkRehype from 'remark-rehype';
import { unified } from 'unified';

const BLOG_DIR = path.join(process.cwd(), 'src', 'posts');

interface BlogMetadata {
    title: string;
    description: string;
}

interface Blog {
    content: string;
    metadata: BlogMetadata;
    slug: string;
}

// Helper function to get blog content and metadata
export const getBlog = async (slug: string): Promise<Blog | null> => {
    const filePath = path.join(BLOG_DIR, `${slug}.mdx`);

    try {
        await access(filePath);
    } catch {
        return null;
    }

    const fileContents = await readFile(filePath, 'utf8');
    const { content, data } = matter(fileContents);

    if (!data) {
        return null;
    }

    const html = await unified().use(remarkParse).use(remarkRehype).use(rehypeStringify).process(content);

    return {
        content: html.toString(),
        metadata: data as BlogMetadata,
        slug,
    };
};

// Helper function to get blog slugs
export const getBlogSlugs = async (): Promise<string[]> => {
    const files = await readdir(BLOG_DIR);
    return files.map((file) => path.basename(file, '.mdx'));
};
With this helper function, we can fetch blog metadata and content, which we'll use to render our blog posts.
#Render Blog Content with Next.js
Next, we'll render the content of the blog post on our Next.js page. Modify the src/app/page.tsx file to include our
blog content:
import { getBlog } from '@/lib/blog';

export default async function Home() {
    const blog = await getBlog('test');

    if (!blog) {
        return <div>Blog not found</div>;
    }

    const { content, metadata } = blog;
    const { title, description } = metadata;

    return (
        <main className="flex min-h-screen flex-col items-center justify-between p-24">
            <header>
                <h1 className="text-4xl font-bold">{title}</h1>
                <p>{description}</p>
            </header>
            <article className="prose dark:prose-invert lg:prose-xl">
                <div dangerouslySetInnerHTML={{ __html: content }} />
            </article>
        </main>
    );
}
This code snippet will render the blog post content, but without syntax highlighting. To add syntax highlighting, let's move to the next step.
#Add Syntax Highlighting with Shiki
To add syntax highlighting to your blog, install the Shiki package for rehype:
npm install -D @shikijs/rehype
Update the blog helper function to use Shiki for syntax highlighting:
import rehypeShiki, { RehypeShikiOptions } from '@shikijs/rehype';
import remarkParse from 'remark-parse';
import remarkRehype from 'remark-rehype';
import rehypeStringify from 'rehype-stringify';
import { unified } from 'unified';
import matter from 'gray-matter';
import { access, readFile } from 'fs/promises';
import path from 'path';

const BLOG_DIR = path.join(process.cwd(), 'src', 'posts');

export const getBlog = async (slug: string): Promise<Blog | null> => {
    const filePath = path.join(BLOG_DIR, `${slug}.mdx`);

    try {
        await access(filePath);
    } catch {
        return null;
    }

    const fileContents = await readFile(filePath, 'utf8');
    const { content, data } = matter(fileContents);

    if (!data) {
        return null;
    }

    const html = await unified()
        .use(remarkParse)
        .use(remarkRehype)
        .use(rehypeShiki, { theme: 'nord' } as RehypeShikiOptions)
        .use(rehypeStringify)
        .process(content);

    return {
        content: html.toString(),
        metadata: data as BlogMetadata,
        slug,
    };
};
With this configuration, syntax highlighting should work on code blocks within your blog posts.
#Implement Dynamic Blog Routes
To allow multiple blog posts, let's create a dynamic route. Update your src/app/blog/[slug]/page.tsx file:
import { getBlog, getBlogSlugs } from '@/lib/blog';
import { notFound } from 'next/navigation';
import React from 'react';

export default async function BlogPost({ params }: { params: { slug: string } }) {
    const blog = await getBlog(params.slug);

    if (!blog) {
        return notFound();
    }

    const { content, metadata } = blog;
    const { title, description } = metadata;

    return (
        <div className="flex min-h-screen flex-col items-center justify-between p-24">
            <header>
                <h1 className="text-4xl font-bold">{title}</h1>
                <p>{description}</p>
            </header>
            <article className="prose dark:prose-invert lg:prose-xl">
                <div dangerouslySetInnerHTML={{ __html: content }} />
            </article>
        </div>
    );
}

export async function generateStaticParams() {
    const slugs = await getBlogSlugs();
    return slugs.map((slug) => ({ slug }));
}
This code snippet sets up a dynamic route for the blog post and renders the content with syntax highlighting and Markdown styling.
The
generateStaticParamsfunction can be used in combination with dynamic route segments to statically generate routes at build time instead of on-demand at request time.Learn more about
generateStaticParamsin the Next.js documentation.
Finally, create a basic blog page that lists all available blog posts. Update src/app/blog/page.tsx to include a list
of blog links:
import { getBlogSlugs } from '@/lib/blog';
import Link from 'next/link';

export default async function BlogPage() {
    const slugs = await getBlogSlugs();
    return (
        <main className="mx-auto flex min-h-screen max-w-sm flex-col gap-4 p-24">
            <h1 className="text-4xl font-bold">Blog</h1>
            <ul className="flex flex-col gap-2">
                {slugs.map((slug) => (
                    <li key={slug}>
                        <Link href={`/blog/${slug}`}>{slug}</Link>
                    </li>
                ))}
            </ul>
        </main>
    );
}
Now you should be able to navigate to your blog page and click on a blog post link to see the content with syntax highlighting and Markdown styling.