In modern web development, it's crucial to maintain a high standard of code quality and enforce best practices. Git hooks allow you to automate tasks at specific points in the Git workflow, ensuring code consistency and enforcing commit standards. This post will guide you through setting up Git hooks in a Next.js project, using tools like Husky, CommitLint, Lint-Staged, ESLint, Prettier, and Validate-Branch-Name.
#Prerequisites
- Basic understanding of Next.js and Git.
- An existing Next.js project.
#Step 1: Installing Husky
Husky is a popular tool for managing Git hooks. To get started, install Husky as a development dependency:
npm install --save-dev husky
Once installed, initialize Husky to set up the Git hooks folder:
npx husky init
#Step 2: Setting Up CommitLint
CommitLint helps you maintain conventional commit messages. It ensures your commit messages follow a specific structure, making them easier to understand and integrate with other tools.
Install CommitLint and the conventional configuration:
npm install --save-dev @commitlint/cli @commitlint/config-conventional
Create a CommitLint configuration file, .commitlintrc.json, with the following content:
{
    "extends": ["@commitlint/config-conventional"]
}
Now add a commit-msg hook to run CommitLint:
echo "npm run commitlint \${1}" > .husky/commit-msg
#Step 3: Adding Lint-Staged for Pre-commit Hooks
Lint-Staged runs linters on staged files, allowing you to automatically fix issues before committing. Install Lint-Staged, along with ESLint and Prettier:
npm install --save-dev lint-staged eslint prettier
If your project uses TypeScript, you may also need to install the following packages:
npm install --save-dev @typescript-eslint/eslint-plugin
Next, update your ESLint configuration to include TypeScript support if needed:
{
    "extends": [
        // ...
        "plugin:@typescript-eslint/recommended"
    ],
    "plugins": [
        // ...
        "@typescript-eslint/eslint-plugin"
    ]
}
For detailed configuration, refer to the Next.js ESLint guide.
Create a Prettier configuration file, .prettierrc.json, and customize it to match your preferred code style:
{
    "semi": false,
    "singleQuote": true
}
Now create a Lint-Staged configuration file, .lintstagedrc.json:
{
    "*.{js,jsx,ts,tsx}": ["eslint --fix", "prettier --write"]
}
To run Lint-Staged before committing, create a pre-commit hook:
echo 'npm run lint-staged' > .husky/pre-commit
#Step 4: Adding Validate-Branch-Name for Pre-push Hooks
To ensure consistent branch names, you can use Validate-Branch-Name. Install it as a development dependency:
npm install validate-branch-name --save-dev
Now create a pre-push hook to run the branch name validation:
echo 'npm run validate-branch-name' > .husky/pre-push
#Testing Your Git Hooks
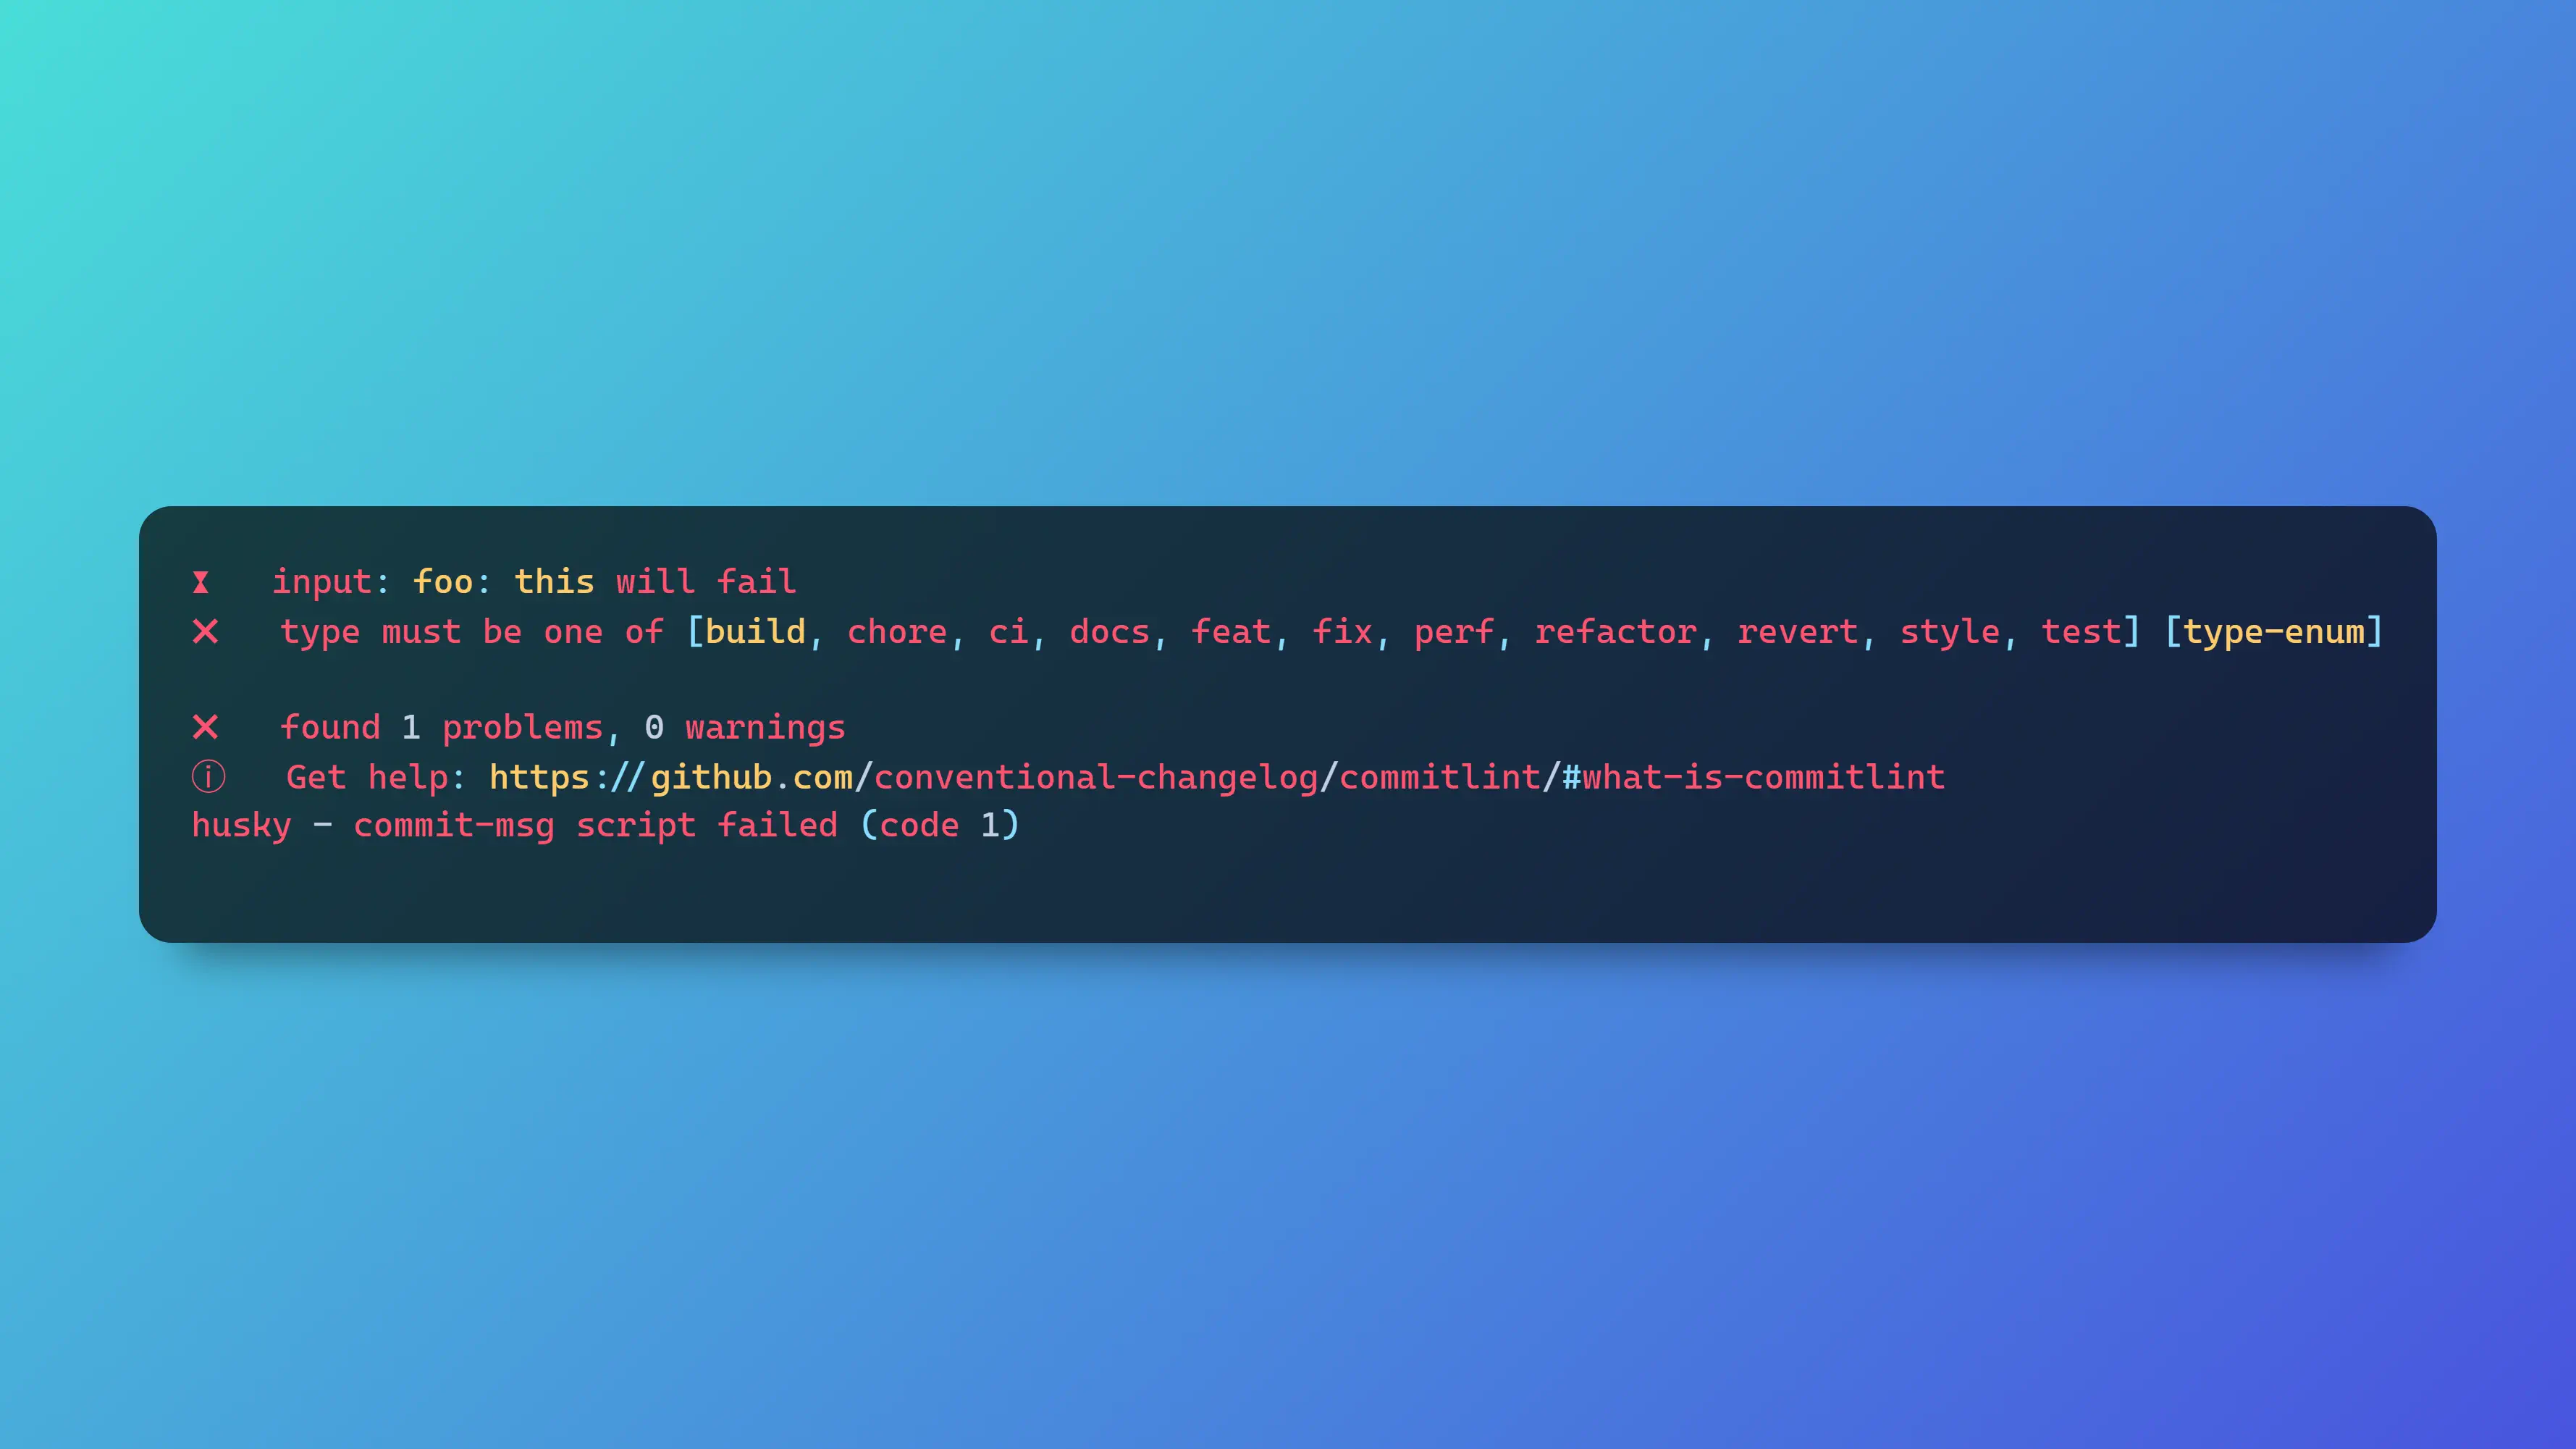
To test your Git hooks, try committing a message that violates the commit linting rules:
git commit -m "foo: this will fail"
You should see an error message indicating the invalid commit message:
⧗   input: foo: this will fail
✖   type must be one of [build, chore, ci, docs, feat, fix, perf, refactor, revert, style, test] [type-enum]

✖   found 1 problems, 0 warnings
ⓘ   Get help: https://github.com/conventional-changelog/commitlint/#what-is-commitlint
husky - commit-msg script failed (code 1)
To test the pre-commit hook, ensure your staged files pass the linters:
git add .
git commit -m "test: pre-commit hook"
Finally, to test the pre-push hook, create an invalid branch name and try to push it:
git checkout -b foo
git push
You should see an error message like this:
Result: "failed"
Error Msg: Branch name validate failed please rename your current branch
Branch Name: "foo"
Pattern:"/^(master|main|develop){1}$|^(feature|fix|hotfix|release)\/.+$/g"

husky - pre-push script failed (code 1)
#Conclusion
Setting up Git hooks in your Next.js project helps ensure consistent code quality and adherence to best practices. With the tools and steps outlined above, you can create a seamless development workflow that catches issues early, ensuring smoother collaboration and more maintainable code.
Happy coding!